15 Fun Halloween Crafts For Children to Make
Halloween crafting can turn an ordinary afternoon into something kids talk about for days. These Halloween Crafts For Children make it easy to create that magic without complicated supplies, expensive kits, or stressful instructions.
From fluffy ghosts and painted pumpkins to silly monsters, bats, mummies, and glowing lanterns, these ideas are designed to be colorful, achievable, and genuinely fun for little hands. Most use familiar materials you may already have at home, making them practical for family afternoons, classrooms, playdates, and Halloween parties.
In my experience, children enjoy crafts most when there is enough structure to get started but plenty of freedom to make the finished project their own. That is exactly what these ideas offer. Whether you need a quick rainy-day activity or handmade decorations for October, you’ll find simple inspiration worth trying, displaying, and saving for later.
1- Paper Plate Spider Webs

- Uses inexpensive supplies that are easy to find.
- Yarn weaving adds texture and makes the craft visually interesting.
- Different yarn colors let children personalize their webs.
- Finished plates work well as window, door, or classroom decorations.
Paper Plate Spider Webs are a simple way to turn basic craft supplies into something kids can proudly display. Children can paint paper plates black, punch holes around the edge, and weave white yarn across the center to create a web effect. Add a small paper spider for a playful finishing touch. This craft works especially well for younger children because the steps are easy to follow and the result looks impressive without needing expensive materials. It also helps develop hand-eye coordination while keeping the Halloween theme fun rather than scary.
In my experience, crafts feel more successful when children can finish them mostly on their own. That is exactly why this idea works so well for classrooms, playrooms, and kitchen tables. Parents can prepare the holes in advance for smaller children, while older kids can handle the full process independently. Using orange, purple, or neon yarn instead of white gives each spider web a different look. Once finished, the plates can be hung on doors, windows, or a simple string garland, creating cheerful homemade Halloween decor that feels personal and easy to reuse.
2- Popsicle Stick Pumpkins
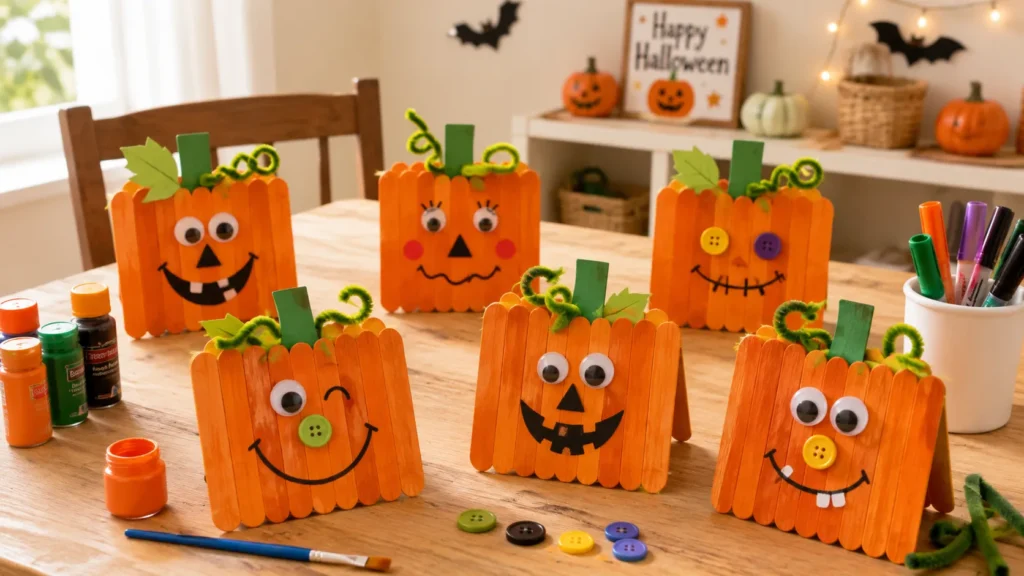
- Turns basic wooden sticks into colorful seasonal decorations.
- Children can choose silly faces, simple patterns, or classic pumpkin designs.
- Small embellishments make each finished pumpkin completely unique.
- Magnets or hanging loops make the craft easy to display afterward.
Popsicle Stick Pumpkins make an ordinary craft supply feel bright, festive, and surprisingly decorative. Kids can glue several wooden sticks side by side, paint them orange, and add a green paper stem with a small curling vine. A simple face can turn the pumpkin into a jack-o’-lantern, while leaving it plain creates a softer fall look. This is one of those Halloween Crafts For Children that works for a wide age range because the design can be as basic or detailed as needed. The finished pieces look especially cute grouped together on a shelf.
The best part is how easily children can personalize every pumpkin without changing the basic project. Some may add glitter, buttons, googly eyes, or patterned paper, while others might draw stripes or funny expressions with markers. I’ve noticed that offering a small tray of decorative options keeps kids engaged longer because they can make creative choices instead of copying one example exactly. For an easy display, glue magnets to the back for the refrigerator or attach string for hanging decorations. The result is colorful, lightweight, inexpensive, and simple enough to make in a single afternoon.
3- Ghost Handprint Art
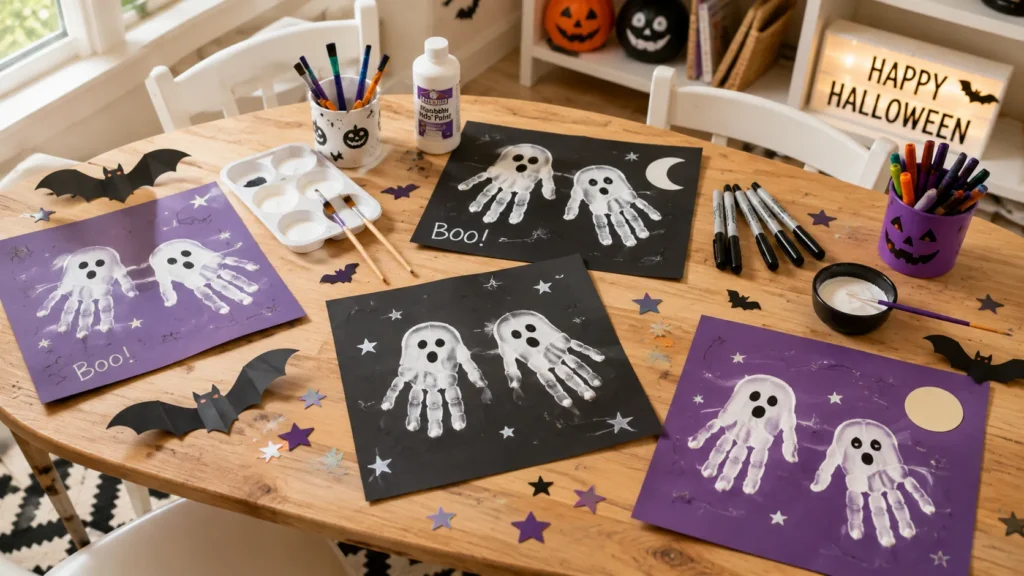
- Creates a personalized keepsake using each child’s handprint.
- High-contrast black and white colors make the artwork stand out.
- Requires very few materials and minimal preparation.
- Older children can customize the background with moons, bats, and stars.
Ghost Handprint Art turns a child’s own hand into a playful Halloween keepsake that feels personal and fun. Paint the palm and fingers with washable white paint, press the hand onto black or dark purple cardstock, and let the print dry completely. Turn the fingers downward so they resemble a floating ghost, then add tiny black eyes and a mouth. The strong contrast makes the artwork stand out instantly, while the handprint shape keeps the project simple for preschoolers and younger children. It is an easy craft that also captures a sweet memory of their size.
This idea is especially useful when you want a quick project with very little setup or cleanup. Place newspaper or a washable mat under the paper, keep a damp cloth nearby, and use a thin layer of paint so the handprint stays clear rather than smudged. Older children can add stars, moons, bats, or handwritten names around the ghost to make the design more detailed. I’ve seen this work well as seasonal wall art because every print looks slightly different. Framed in simple black or white frames, the finished pieces can even become charming family Halloween decor.
4- Cotton Ball Ghosts
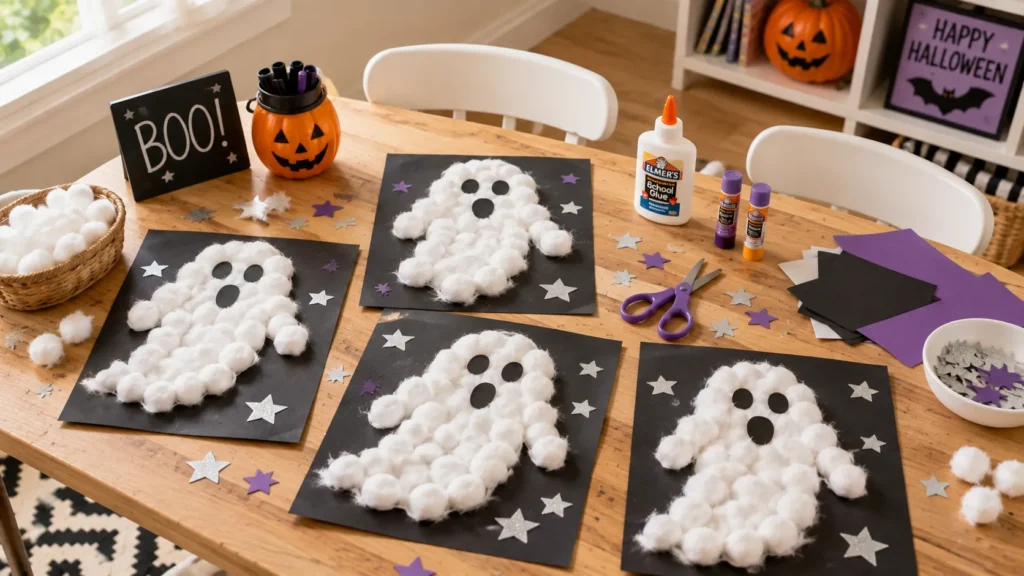
- Soft cotton gives each ghost a fun, fluffy texture.
- Black cardstock creates strong contrast and makes the white shapes pop.
- Simple materials keep preparation affordable and beginner-friendly.
- Children can experiment with different ghost shapes and expressions.
Cotton Ball Ghosts bring irresistible texture to Halloween crafting while keeping the process wonderfully simple for little hands. Start by drawing a large ghost outline on dark cardstock, then let children fill the shape with soft cotton balls and glue. Black paper circles create expressive eyes and mouths without requiring complicated cutting or drawing. The fluffy surface instantly makes the finished artwork more interesting than a flat paper project. Because the materials are lightweight and inexpensive, this idea works beautifully for home craft afternoons, preschool activities, or classroom stations where several children need supplies at once.
What makes this project especially useful is how easily it can be adjusted for different ages and abilities. Younger children can focus on placing cotton balls inside a prepared outline, while older kids can design their own ghost shapes and background details. Add silver stars, paper moons, or tiny bats around the edges for a fuller Halloween scene. Keeping the background dark helps every white texture stand out clearly from across the room. Once dry, the artwork can decorate bedroom doors, classroom boards, or hallways, creating a playful seasonal display without making the space feel overly spooky.
5- Toilet Roll Bats
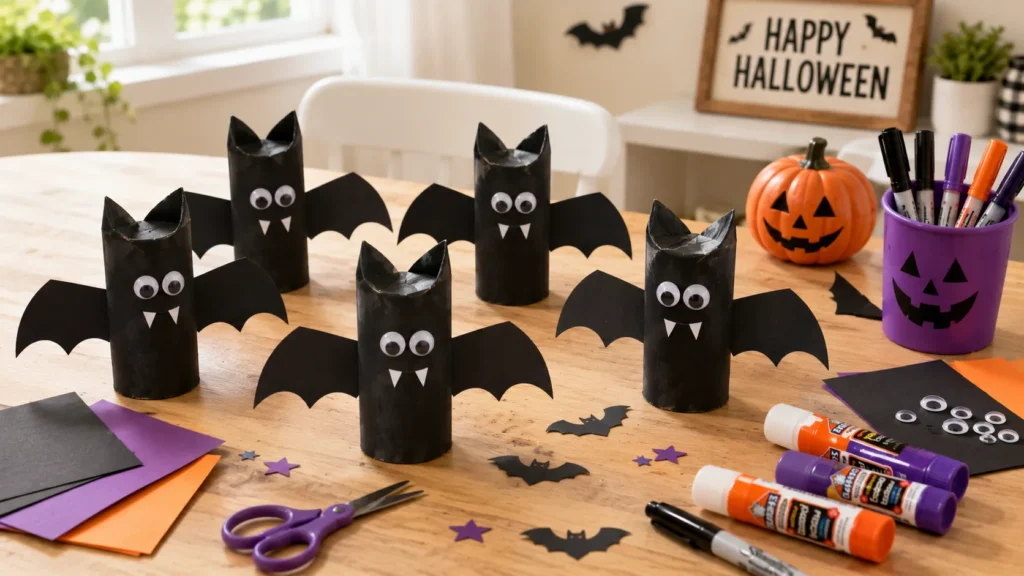
- Reuses cardboard tubes that would otherwise be discarded.
- Folded wings create a bold shape with plenty of visual impact.
- Googly eyes and tiny fangs add personality without complicated steps.
- Finished bats can stand on shelves or become hanging decorations.
Toilet Roll Bats transform an everyday recyclable into a surprisingly cute Halloween decoration children can customize themselves. Paint an empty cardboard tube black, fold the top edges inward to form pointed ears, then attach wings cut from sturdy black paper. Googly eyes and small white paper fangs bring each bat to life with almost no extra effort. The combination of simple shapes and bold dark color creates an instantly recognizable character. These recycled Halloween crafts are especially handy when you want an affordable activity that uses materials already available around the house and encourages creative reuse.
I’ve noticed that kids stay interested longer when a craft leaves room for their own funny details. One child might make enormous purple wings, while another adds orange spots, glitter, or a silly expression. Keep the base design simple, then place extra paper, stickers, and markers nearby so everyone can personalize a bat without needing constant instructions. Finished tubes can stand upright along a mantel or bookshelf, or you can attach string and hang them from branches. A group of different bats creates a lively handmade display while showing children how ordinary packaging can become something imaginative.
6- Pumpkin Paper Garland
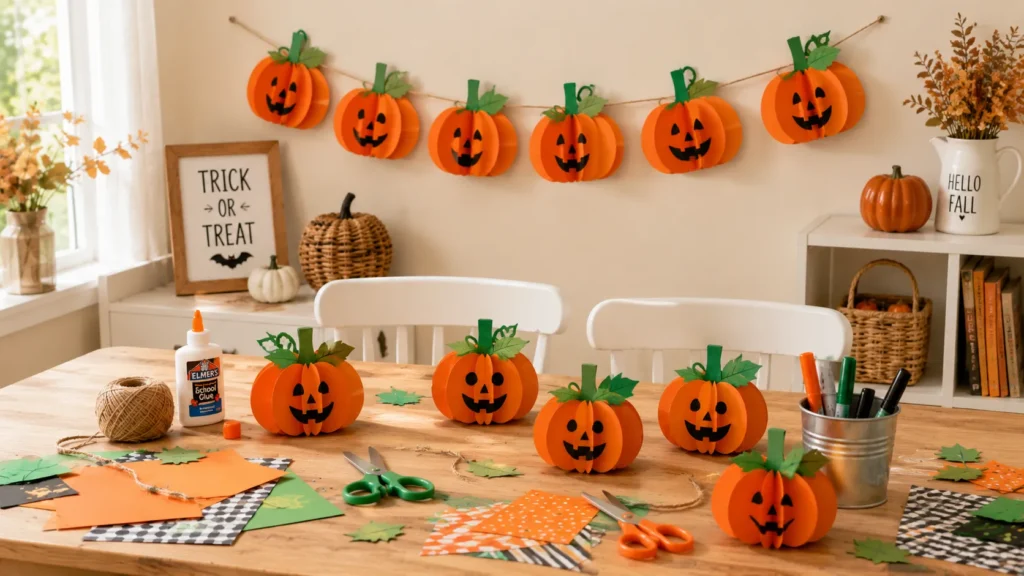
- Repeated pumpkin shapes create an instant festive focal point.
- Paper colors and patterns can match existing Halloween decorations.
- Each child can decorate one pumpkin for a collaborative family project.
- The lightweight garland works on walls, shelves, windows, or doorways.
Pumpkin Paper Garland turns individual children’s creations into one cheerful decoration that can brighten an entire room. Cut simple pumpkin shapes from orange cardstock, then let kids add green stems, drawn faces, stickers, or patterned paper details. Punch a small hole near the top of each pumpkin and thread the finished pieces onto twine or ribbon. The repeating orange shapes create strong visual impact even when every pumpkin looks different. This project works particularly well for siblings, playdates, or classrooms because everyone can contribute one piece while still enjoying plenty of freedom to decorate it differently.
The finished garland becomes even more charming when you intentionally mix sizes, expressions, and shades of orange. In my experience, perfectly matching pieces are unnecessary for children’s seasonal decor; small differences often make the display feel warmer and more memorable. Leave a little space between each pumpkin so the individual designs remain easy to see, and secure them with small knots if they slide along the string. Hang the garland across a window, bookshelf, doorway, or blank wall. It adds Halloween color without taking up valuable surfaces, making it especially practical for smaller homes or busy family spaces.
7- Paper Cup Monsters

- Bright colors make the monsters playful instead of frightening.
- Cups provide an easy three-dimensional base for younger children.
- Yarn, paper, and googly eyes add texture and personality.
- Finished monsters can decorate shelves, tables, or Halloween party displays.
Paper Cup Monsters turn basic party supplies into colorful characters that children can make as silly as they like. Flip paper cups upside down, paint them green, purple, orange, or black, and let the surface dry before adding features. Googly eyes, paper teeth, yarn hair, and tiny horns instantly create expressive faces without requiring advanced craft skills. The three-dimensional shape makes these monsters especially appealing because children end up with something they can hold and display. Using washable paint and pre-cut features also makes the activity manageable for younger kids who may need simpler steps.
The real fun comes from giving children freedom to invent a monster rather than showing them one design they must copy. Set out several eye sizes, yarn scraps, paper shapes, stickers, and markers, then encourage unusual combinations. I’ve seen this work well with groups because every finished character becomes noticeably different, giving children an easy opportunity to talk about what they created. Once complete, arrange the monsters together on a shelf, party table, or windowsill. Their bold colors and funny expressions create a cheerful Halloween display while turning an inexpensive craft session into imaginative, open-ended play.
8- Leaf Ghost Faces
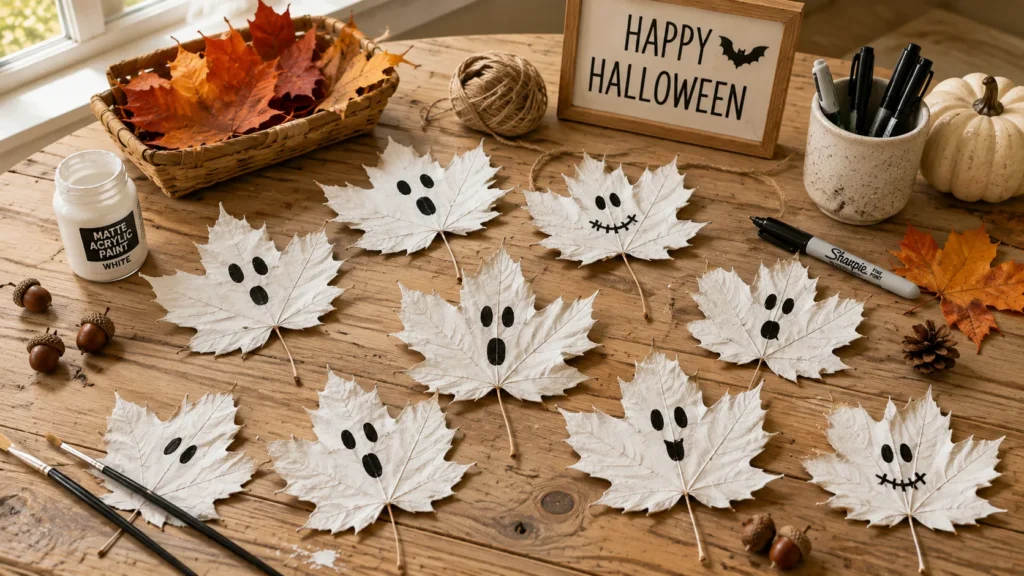
- Combines an outdoor leaf hunt with an indoor creative activity.
- Natural leaf shapes make every ghost look slightly different.
- White paint creates striking contrast against autumn surroundings.
- Finished leaves can become garlands, table accents, or simple wall decor.
Leaf Ghost Faces give fallen autumn leaves a clever Halloween makeover using only paint and a few simple details. Collect sturdy leaves with interesting shapes, press them flat if needed, then cover the front with white craft paint. Once dry, add black eyes and small mouths to create tiny ghost expressions. The natural points and curves of each leaf make the finished characters wonderfully varied without extra cutting. This is a particularly engaging option for children because gathering the materials can become part of the activity, combining outdoor exploration with a relaxed craft session once everyone returns inside.
For the best results, choose leaves that feel dry but are not so brittle that they crumble when handled. A thin first coat of paint usually preserves more of the natural veins, while a second coat creates a brighter, cleaner white surface. Children can draw surprised, smiling, or sleepy faces to give every ghost its own personality. Attach the finished leaves to twine for a lightweight garland, or scatter them across a seasonal display with pumpkins and pinecones. The organic texture adds warmth and keeps these easy Halloween projects feeling creative, inexpensive, and connected to autumn.
9- Mason Jar Lanterns
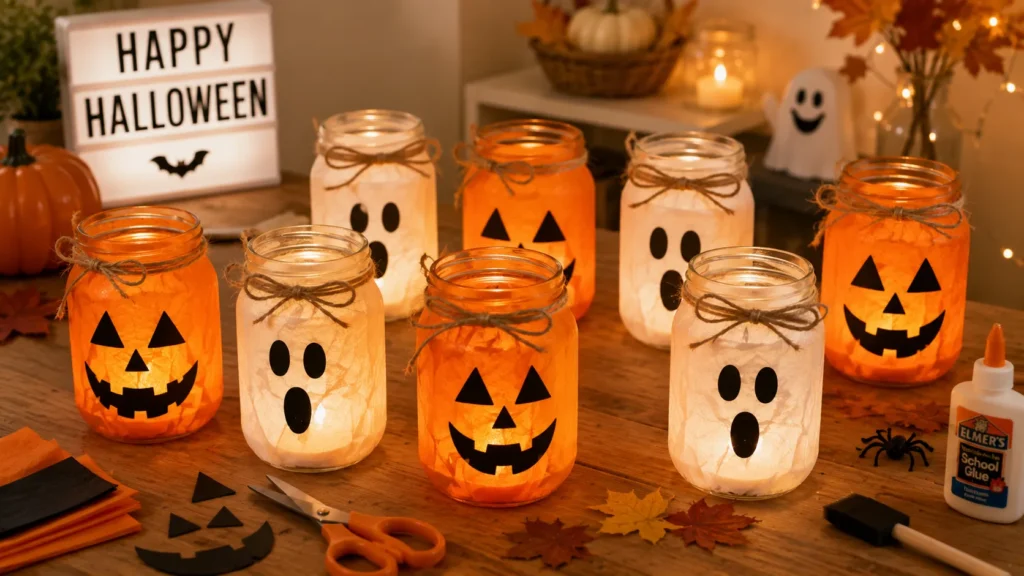
- Tissue paper gives ordinary jars a soft stained-glass effect.
- Battery-operated lights create a safe, warm glow for children.
- Simple faces remain visible during both daytime and evening.
- Finished lanterns add handmade charm to tables, windowsills, and shelves.
Mason Jar Lanterns add a magical glow to children’s Halloween crafts without requiring complicated materials or techniques. Cover clean glass jars with small pieces of orange or white tissue paper using child-safe decoupage glue, then add black paper faces after the surface dries. Orange jars can resemble pumpkins, while white versions become glowing ghosts. Place battery-operated LED tea lights inside rather than real candles, especially when children are handling the decorations. The translucent paper softly diffuses the light, creating a warm effect that looks impressive on windowsills, shelves, or a family Halloween table after sunset.
Safety and simplicity matter most with this project, so adults should handle glass preparation and supervise younger children throughout the activity. If glass feels unsuitable for your child’s age, clear plastic jars can create a similar effect with less worry about breakage. Keep facial details bold and uncomplicated so they remain visible when the lantern is illuminated. I’ve noticed that slightly overlapping tissue pieces produce richer color and a more handcrafted finish than perfectly aligned squares. Group three or four lanterns together at different heights for a cozy display that brings gentle Halloween atmosphere into a room.
10- Egg Carton Spiders

- Reuses empty egg cartons for an affordable seasonal activity.
- Pipe-cleaner legs add flexible texture and playful movement.
- Bright eyes keep the spiders cute rather than scary.
- Finished spiders work well on shelves, tables, or handmade webs.
Egg Carton Spiders turn leftover packaging into playful Halloween creatures with plenty of texture and personality. Cut individual cups from a cardboard egg carton, trim rough edges, and let children paint each piece black, purple, or another favorite spooky color. Once dry, add pipe-cleaner legs and large googly eyes to create an instantly recognizable spider. The rounded carton shape provides a sturdy body without complicated construction, making this project manageable for younger crafters. It also introduces children to creative reuse, showing how something headed for recycling can become a fun decoration with only a few inexpensive supplies.
For easier assembly, adults can make small holes for the legs before children begin decorating the spider bodies. Bend each pipe cleaner slightly so the finished spiders stand securely instead of lying flat on the table. Kids can experiment with striped legs, multiple eyes, tiny paper smiles, or colorful spots for more personality. In my experience, recycled crafts work best when the original material is transformed enough to surprise children, and this project does exactly that. Place the spiders on homemade yarn webs, bookshelves, or party tables to add playful dimension without creating an overly frightening Halloween display.
11- Footprint Witch Art
- Turns a child’s footprint into a memorable seasonal keepsake.
- Green, black, orange, and purple create a classic Halloween palette.
- Paper hats and yarn hair add easy layers of texture.
- Names and dates can transform the artwork into a yearly memory.
Footprint Witch Art creates a wonderfully personal Halloween keepsake while giving children an excuse to enjoy a slightly messy painting activity. Cover the bottom of one foot with washable green paint, press it carefully onto sturdy white cardstock, and allow the print to dry completely. Position the heel as the witch’s face, then add a black paper hat, orange yarn hair, eyes, and a simple smile. The recognizable footprint makes every picture unique, while the added details turn an ordinary print into a colorful character that feels especially meaningful when displayed with other handmade seasonal artwork.
A little preparation makes this activity much easier, especially when working with preschoolers or several children at once. Keep wipes, warm water, and an old towel nearby before applying any paint, and use only a thin layer for a clearer footprint. Children can decorate the witch’s hat with stars, stickers, glitter paper, or tiny buckles once the print is dry. Adding the child’s name and year in one corner turns the project into a keepsake worth storing. Over time, making a new version each Halloween can create a sweet visual record of how quickly little feet grow.
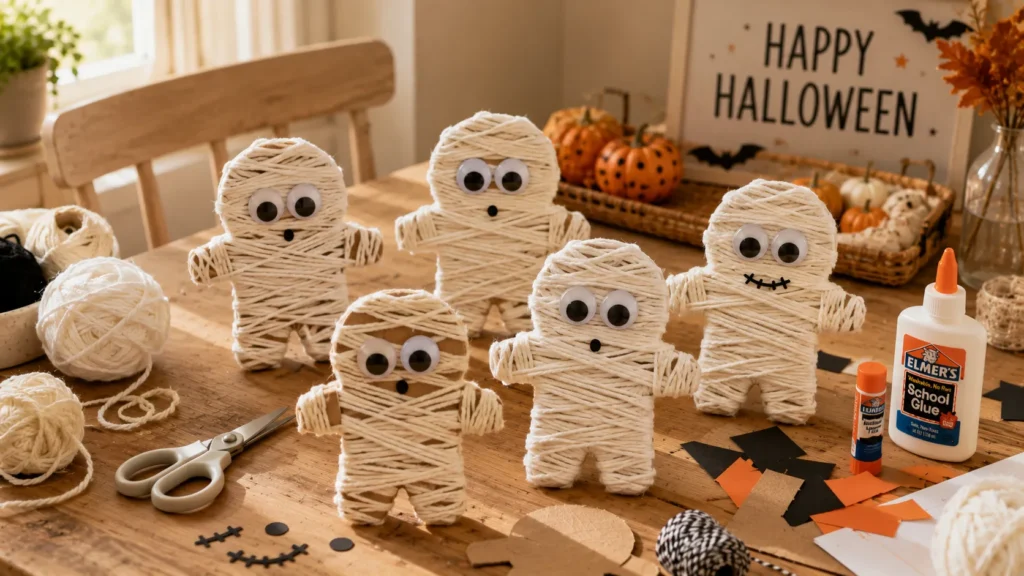
12- Yarn Wrapped Mummies
- Yarn wrapping adds tactile texture and keeps little hands busy.
- Cardboard provides a sturdy, inexpensive base for repeated wrapping.
- Googly eyes create an instantly playful mummy face.
- Finished figures can become ornaments, garlands, or tabletop decorations.
Yarn Wrapped Mummies combine simple materials with a hands-on technique that children can repeat until their character looks perfectly bundled. Cut a basic person shape from sturdy cardboard, secure one end of white yarn with tape, and let kids wrap the yarn around the body in different directions. There is no need for perfectly even lines, which makes the project forgiving for beginners and younger children. Add large googly eyes between the yarn layers for a funny finishing touch. The soft, overlapping strands create interesting dimension while helping children practice coordination, concentration, and controlled hand movements.
This craft looks best when some cardboard remains visible between the yarn because those little gaps create the uneven appearance of mummy bandages. Use thicker yarn for younger children who may find fine strands difficult to manage, and prepare cardboard shapes beforehand if cutting would slow the activity down. Children can attach ribbon loops to make ornaments or connect several finished figures along twine for a handmade garland. I’ve noticed that tactile projects like this often hold attention surprisingly well because the repetitive wrapping feels satisfying. The result is lightweight, durable, and easy to display throughout Halloween.
13- Coffee Filter Bats

- Coffee filters create delicate, textured wings with very little effort.
- Water-based colors blend naturally for a soft watercolor effect.
- Simple cardstock bodies keep assembly quick and beginner-friendly.
- Finished bats look striking when displayed across bright windows.
Coffee Filter Bats create soft, colorful wings that look far more detailed than the simple technique suggests. Let children color plain coffee filters with washable black, purple, or blue markers, then lightly mist them with water so the shades spread and blend. Once completely dry, pinch each filter through the center and attach it to a small black cardstock bat body. Add paper ears and googly eyes for extra personality. The translucent, slightly crinkled wings give these bats wonderful visual texture, making them an easy choice when you want lightweight decorations that still look interesting from across the room.
These bats become especially effective when several are displayed together at slightly different heights. In my experience, placing watercolor-style crafts near a bright window makes their blended colors and delicate textures much easier to appreciate. Children can experiment with different marker combinations, but limiting each filter to two or three shades helps prevent muddy results. Attach finished bats to a wall with removable tape, suspend them from string, or arrange them across a window. Their lightweight construction makes decorating simple, while the color-blending step adds a small creative experiment that keeps the activity engaging without making it complicated.
14- Pumpkin Rock Painting

- Smooth stones create sturdy decorations children can keep for years.
- Orange paint instantly turns rounded rocks into miniature pumpkins.
- Different faces encourage creativity without adding difficult steps.
- Finished pieces can decorate shelves, porches, desks, or seasonal displays.
Pumpkin Rock Painting transforms ordinary stones into tiny decorations that feel colorful, sturdy, and satisfyingly handmade. Choose smooth, rounded rocks, wash away any dirt, and let them dry before children apply orange washable or child-safe craft paint. Once the base coat dries, add green stems, simple leaves, and black jack-o’-lantern faces with a small brush or paint marker. Rounded stones naturally resemble pumpkins, so even basic designs look convincing. This is one of the easiest Halloween Crafts For Children to adapt for different ages because kids can create anything from simple smiles to more detailed patterns.
The finished rocks are useful beyond craft time because they can become decorations, pretend-play pieces, or cheerful additions to an autumn display. For younger children, draw facial outlines first and let them fill in the shapes; older kids can design expressions independently. I’ve seen this work well when children choose their own rocks outdoors before painting, since finding the right shapes adds another enjoyable step to the activity. Arrange several pumpkins together in a shallow basket, along a windowsill, or beside larger seasonal decorations. Their weight keeps them stable, and every imperfect shape adds character to the finished collection.
15- Paper Bag Monsters
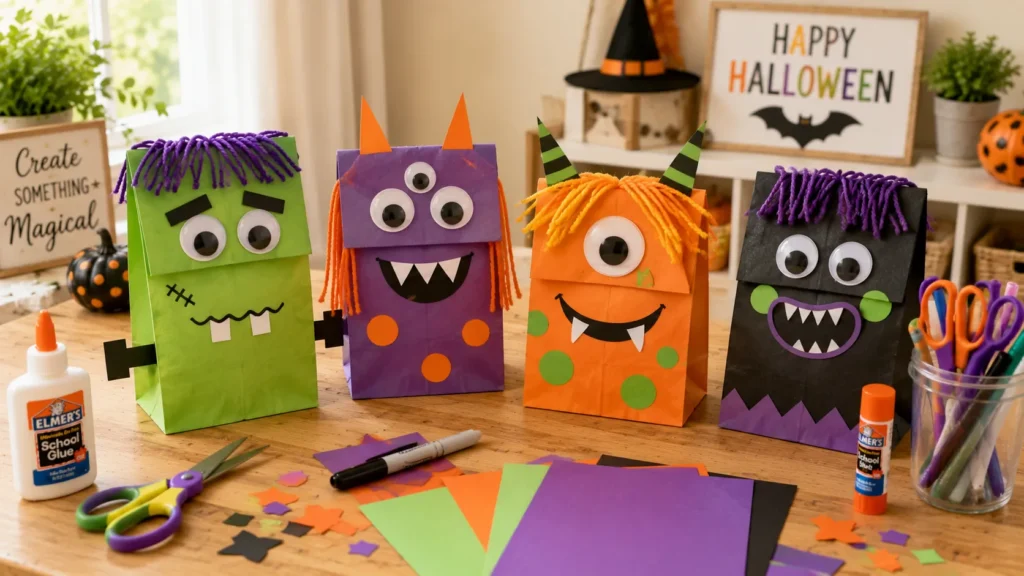
- Paper bags provide an inexpensive base for both crafting and pretend play.
- Layered eyes, teeth, and yarn create bold visual texture.
- Open-ended decorating encourages children to invent original characters.
- Finished puppets can inspire games, stories, and Halloween performances.
Paper Bag Monsters combine crafting with imaginative play, giving children something entertaining to use after the glue has dried. Start with plain paper lunch bags and add colorful cardstock, googly eyes, yarn, stickers, and washable markers. The folded flap naturally becomes a moving mouth, making it easy to create silly teeth, tongues, or expressions without complicated construction. Children can design green monsters, purple creatures, fuzzy orange characters, or completely unexpected combinations. Because there is no correct final appearance, this project encourages experimentation and gives every child the freedom to make a character that feels entirely their own.
What makes this idea especially valuable is that the activity continues long after the decorating stage ends. Once the puppets are finished, children can create names, voices, stories, or a simple Halloween puppet show using their new characters. Offer pre-cut shapes to younger kids, while older children can design and cut their own horns, ears, teeth, and accessories. Mixing matte paper with soft yarn and shiny stickers gives each puppet stronger visual contrast. The finished monsters are easy to store, inexpensive to replace, and perfect for turning a quiet craft afternoon into active, creative play with siblings or friends.
Conclusion
A memorable Halloween activity does not need expensive supplies or complicated instructions. These Halloween Crafts For Children show how paper, yarn, paint, recycled materials, and a little imagination can become decorations and keepsakes kids are proud to make. I’ve noticed that the simplest projects often create the best moments because children have more freedom to experiment and personalize their creations. Choose one idea for an easy afternoon activity, or try several throughout October. Save this post on Pinterest so the inspiration is ready when you need it, and share it with parents, teachers, or friends looking for creative Halloween fun.